Yesterday I spent some time testing some new lighting techniques (and tweeted about it) and got a number of inquires for more information about what I was doing. I have started to put together a longer post about some of the techniques that I am working on. But as I got into it I realized that there are so many different issues that come up that there is no way I’ll be able to write up a comprehensive post today. So that post is going to be a work in progress and will happen sometime in the future. However, here is a quick look at what I was doing yesterday.
My main focus was not so much on the food (as you will see I didn’t actually use any food on this test), but the quality of light. Yesterday was cold and gray, and by the time I’d gotten through my todo list it was nearly dark outside. In these cold winter months this happens a lot. Since I didn’t have the sun coming in my windows I needed to create my own. For my subject matter I worked with two different sake sets, along a few chopsticks from my collection. For the record, I only have a very small (but growing) collection of props. I am always keeping my eyes open at thrift stores for interesting stuff and for creative ways to make what I already have accomplish more in my photographs. For example, in these photographs, the burlap placemat is actually an empty basmati rice sack that I cut open at the seams and ironed. The surface I’m using is two $5 floor tiles I got at Home Depot a while back.
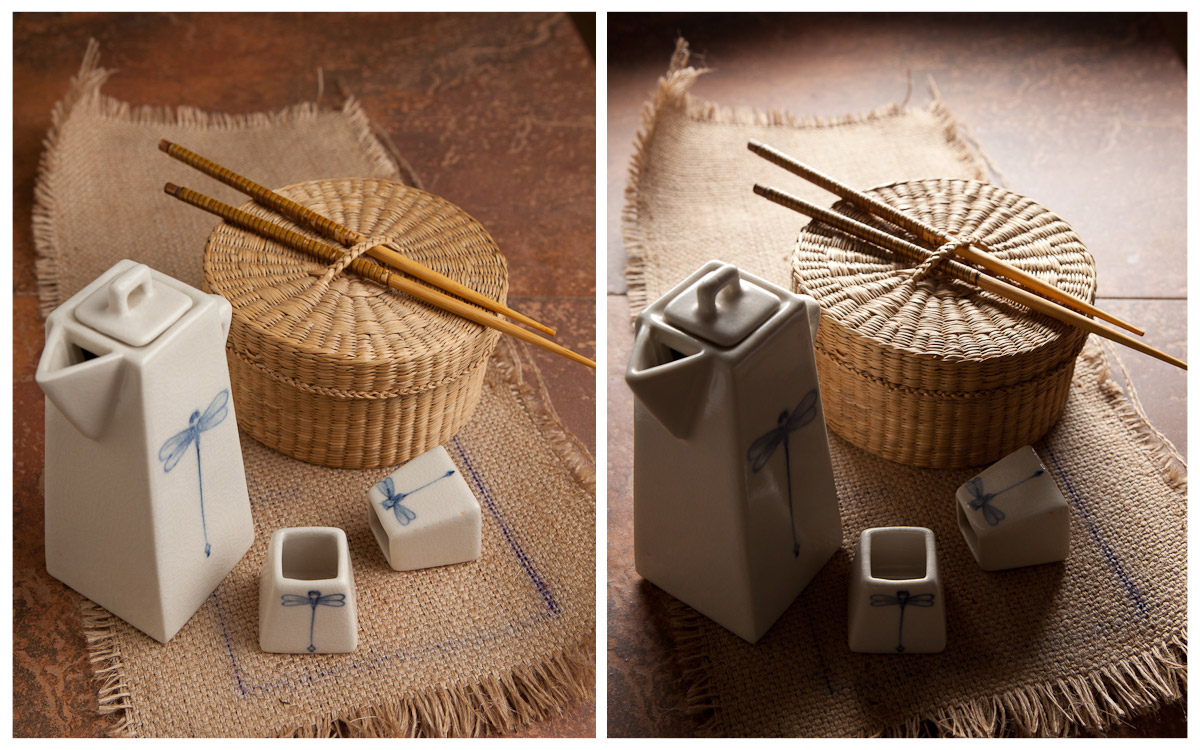
Here is the breakdown of how I lit the image: I have a large octabank softbox on camera right (a light modifier that I generally use for portraits) which is my key light. On camera left there is a white wall just outside of the frame. The light from my key light bounces off of the wall and back onto the subject, acting as my fill light. Finally, at the top the frame (behind the subject) I have a second softbox (with a grid) pointing back at the subject which has two functions. It gives my subject a rim light, which gives it nice separation (notice the nice highlight along the edge of the chopsticks). It also mimics a window light streaming in from behind. All of the light sources are large and soft, which means that I don’t get any harsh shadows, and the specular highlights on the glassware are nicely shaped.
Both lights work together build the image. In this case, either of these lights working alone at this intensity and exposure wouldn’t cut it. Here is a look at each light firing independently:
The image on the left is the key light by itself, the image on the right is the rim light by itself. As you can see, the rim light causes too many dark shadows, and the key light is fairly flat and not every exciting. Combined however they make pleasing and natural looking light.
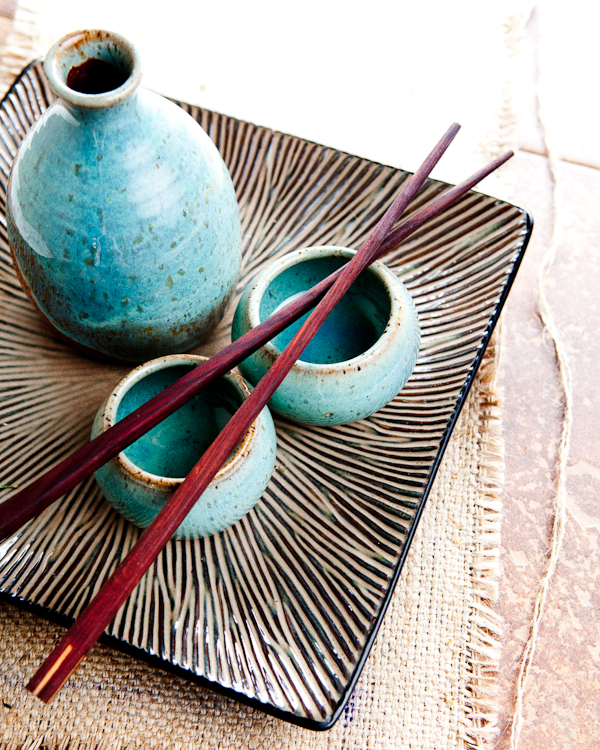
Post-production is just as important as setting up your lighting as well. For a second shot, I used the same lighting set up and simply altered the camera angle. Then I over-exposed the image slightly, increased the contrast, and then cooled down the color temperature. This gives me a completely different look:
Full disclosure: I did use my professional gear (softboxes and strobes) for these shots because that is what I have available. I get paid to make photographs and therefore have a lot more gear than your typical blogger. Gear is awesome and fun but there is no need to go out and buy all sorts of expensive stuff to get this effect. You can accomplish the same shot by using a Home Depot work light behind a sheet as a replacement for each of the softboxes. The sheet will do the same thing as the softbox – it will diffuse the light. Using hot lights instead of expensive strobes makes color correction a little more challenging, and you’ll likely have to use a longer exposure, but it can be done.
I’ll try to demonstrate what can be done with inexpensive equipment and discuss in more detail some of the factors in shaping light in a more comprehensive post in the future. In the mean time, if you have any specific questions, hit me up in the comments and I’ll do my best to answer them. Hopefully this brief explanation will give you some ideas to get started.


4 Comments
Kimberly
January 11, 2011 at 1:06 pmGreat post! I’ve already got some ideas in my head about different ways to start photographing my food! (Love the floor tile tip; I’ve got a number of placements I use, but love the look of the tile!)
I’m going to try your tip on using a work light, so here’s my question … I found a number of inexpensive work lights on the Home Depot site … but am confused by fluorescent and halogen. Would using a sheet as a diffuser work in both instances? Or should I choose one light source over the other? Both for different situations?
We have very little natural light in our condo and I need to do something!
Thanks!!!
ShootToCook
January 11, 2011 at 1:52 pmOk, these are great questions. First about the tile – you can buy individual pieces of tile at Home Depot, but I would also check out ReStore on Forest Parkway for tile and other surfaces. They have all kinds of good stuff which is cheap.
For the work lights: the only difference between using fluorescent versus halogen is the color temperature. As long as you use all fluorescent lights or all halogen it is fairly easy to color correct. Your camera will have different settings for each kind of light which will get you part of the way, but you may need to do some additional color correction in post production depending on the specific kind of light. You’ll get into trouble if you mix the two, however, because each will have a different color temperature. If you correct for the part of the image lighted by fluorescent light, then the halogen light will look weird and vice versa. This is further complicated by the fact that fluorescent lights these days have all sorts of different temperatures, so you’d have to be careful to get bulbs that are balanced at the same temperature. Bottom line, make it easy on yourself and stick to the using all of the same kinds of lights and bulbs for any given shoot.
Now, as far as using a sheet for diffusion, this will depend on the kind of light you’re using and how thick your sheet is. The sheet will diffuse any type of light, just remember that you will lose some of the strength of that light through your diffusion material. Fluorescent lights being weaker than halogens may not be bright enough to illuminate your subject after being passed through the diffusion material. However, some fluorescents have semi-opaque casing which diffuse a lot without a modifier like a sheet. Check out this portrait. It was done with high end fluorescent lights called Keno Flos with just the bare bulbs in their casings. However, the standard coil bulb fluorescent bulbs will likely be too harsh to do this. The halogen work lights have the power to get through your sheet, but they get hot, so there is a trade off.
Biggest things to remember: Keep the light consistent. Be aware of any other ambient light in your condo as well. If you’re in the kitchen shooting with fluorescent lights and you have tungsten or halogen lights on in the living room, you could get spill over which will mess with the color correction.
Kimberly
January 11, 2011 at 2:27 pmWow … thanks for the in-depth answer. I really appreciate you taking the time to educate this amateur photographer!
I’m going to pick up a fluorescent work light (our kitchen lights are fluorescent) and see how it goes!
Geraldine
March 11, 2013 at 6:21 amThanks for reiterating time and time again that there is no need to buy expensive lights. Great tips!